What we do

Celebrating the Ancient Art and Appreciation of Locally Crafted Beer


Friday, January 11, 2013

Tips for Advanced Brewing Wizardry

WARNING:  Several of the following tips and trick are not for the beginning brewer, although some of the information can be helpful to those interested in delving a little deeper into the processes and equipment used. 

Tips and Recommendations Supplied by Josh Skinner, Master Brewing Afficionado and BRBA Member.  Thanks, Josh.

·         Automatic Temperature Compensating (ATC) Refractometer:
o   Pros:  Makes checking gravity of mash/sparge/boil/Original Gravity much easier than a hydrometer.  You only need a few drops of wort to check the gravity as opposed to the several ounces required for a hydrometer.  Possibly best of all, you don’t have to wait for the sample to cool down.
o   Cons:  You really should check the calibration of the refractometer before each use.  To do this, you just put a few drops of distilled water on the lens and make sure it reads zero.  Refractometers are not reliable for taking readings once fermentation has begun.
·         Automatic Temperature Compensating (ATC) pH Meter:
o   Pros:  Instant & much more accurate pH reading of mash/sparge/boil than pH strips.  pH strips have been shown to be inaccurate by as much as .3 pH units.  Most pH meters are accurate within .01 pH units.
o   Cons:  pH electrode is delicate and must be stored in special storage solution when not in use.  pH meters are much more expensive that pH strips.  My meter was about $80.
·         Stir Plate:
o   Pros:  Make your yeast happy! To me, making yeast starters   before your brew day is one of the easiest and most effective ways to improve your beer.  By constant aeration, a stir plate greatly increases the yeast cell count of a starter.  Best of all, they’re pretty cheap and easy to make if you feel like going the DIY route.
o   Cons:  A little pricey if you don’t DIY.
·         Pure O2 tank with Aeration Stone:
o   Pros:  Get more oxygen into your wort for better yeast health.  This will directly translate to less off flavors produced during fermentation and more vigorous, quicker starting and more complete fermentations.  Healthier, happier yeast make better beer!  Probably best of all, getting one of these means no more shaking the carboy!  Disposable pure O2 tanks can be found most anywhere that sells welding supplies.
o   Cons:  More equipment to clean, sanitize and store.
·         Quality Digital, Calibrating Instant-Read Thermometer:
o   Pros:  No more waiting for the dial to creep across the thermometer face.  Digital face is easy to read.  Some are waterproof.
o   Cons:  Takes batteries.
·         Water Report/Brewing Water Software:
o   Pros:  Know what’s in your water and how it will affect your beer.  Use software to calculate water adjustments (pH, matching water to specific profiles) if needed.  Most brewing water software is free; I use the Bru’N Water spreadsheet.  If you are on city water, often times the city can provide a water report free of charge.
o   Cons:  Water reports can cost $15-$30.  Some suggest getting a water report for each season for those of us on wells.  Water chemistry can be a little daunting to learn about at first but there are some really good resources out there for educating yourself.
·         Recipe Calculator Software (BeerSmith, Hopville.com, Beer Tools):
o   Pros:  Create recipes with relative accuracy.  Allows to you visualize how different ingredients affect the beer you are creating.  Very useful tool when trying to create a beer “to-style” as most software gives style guidelines.
o   Cons:  May aide brewers in bypassing some of the theory behind recipe formulation.  Can be tricky getting your brew system specifics dialed in correctly.  Most software is not free.  Recipes can easily be lost if not backed up properly.
·         Mash Out Step:
o   Pros:  This step will likely improve your mash efficiency.  By raising the grainbed temperature to 168-170 *F, you halt all enzymatic activity resulting in a more uniform OG when re-creating beers.  “Mashing out” also helps in dissolving wort sugars resulting in more efficient lautering.
o   Cons:  Some may find this step is not conducive to their system.  Mashing out is also one extra step in a brewday.  A trait some may find unappealing.
·         Be careful about changing more than one variable at a time.
o   I’m not going to do the pro and con thing for this one because it doesn’t really apply.  When re-brewing a beer and making changes to the recipe, try to only change no more than a couple variables at a time.  Say you change your malt bill and your mashing regime and find your resulting beer to be superior to the original batch.  How will you know for sure what changes resulted in this brewing triumph?
·         Keep a highly detailed brewing journal, documenting everything you do associated with your beers.
o   In archaeology, we had to keep excruciatingly detailed notes of our excavation methods, processes and even daily routines.  I try and transfer some of that thoroughness to my brewing journal.  Be honest in your notes, if you hit 154 instead of 155 *F on that Sacch’ rest, note it.  You might just find out that one degree means the difference between a good beer and a “Holy nectar-of-the-Gods!” beer.  Record when things go differently than you planed and when things go right.  Finally, don’t let the note taking end on bottling day.  Note your storage temperatures and maintain tasting notes on the finished product.

Wednesday, December 12, 2012

Home Brewing Beer Trifecta

Displaying true brewer ingenuity, Kevin has 3 batches fermenting at one time and specialized system to handle the foam by-product of fermentation (called "krausen").

Thursday, December 6, 2012

All Grain Brewing - Preparation for a Local Suppy

A couple of our brewers have used the advanced all-grain method of brewing, using malted barley grains, hops and yeast.  Each brewer has created an all-grain smoked porter using the slightly smoked malted barley donated by Rick from the Copper Fox Distillery in Sperryville.  These porters will be tested out in our next meeting/tasting event towards end of January (more info on that to come).

Here are some photos of the process.  Involves removing the dried rootlets from the malted grains ("malted" means germinated & dried).  The rootlets will give off flavors to beer if not removed.  Next is grinding the malt (cracking/crushing husks) to prepare for boiling (mashing).  This releases the interior seed components of the grain from the husks - necessary for extracting the sugars and starches for beer making.  This puts us further along in our goal to use a local supply of malted barley grains, yeast, and hops to make quality locally crafted beer.
malted grains with dried rootlets attached

sifter (shaken and stirred to break up rootlets from barley grains)

rootlets sifted out of barley for disposal

barley grains being crushed/cracked

close up of cracked barley - ready for mashing

Sunday, November 11, 2012

Oktoberfest Meeting Summary

Tastings this time incuded some fermented non-beer items as well as craft beer:

Kombucha - fermented tea
Vienna Lager
Belgian Saison
Hazelnut Midwinter Porter
IPA
Imperial Stout
Wasmunds Award Winning Single Malt Whisky

Craft beers were served with bratwurst from sperryville market cooked with locally grown and homemade sauerkraut (cooked in a crockpot with a bottle of home brew, of course).  Locally made delicious cheeses contributed to the tasting by Jim Turner and his wife.

Dan gave us an update from our international member in Spain on the growing craft beer industry there.

Rick Wasmund from the Copper Fox Distillery brought a bottle of his award winning single malt whiskey, as well as donated 50 lbs of malted barley (two-row endeavor variety), for our brewers to experiment with.  He informed us of his efforts to set up a local malting operation.

Discussed the association's barley project.  Jeff Jennings a local farmer talked about his test plot of 3/4 of an acre of two-row barley (charles variety).   He also brought some of his delicious and locally grown pork  barbeque ribs.  They disappeared fast!

Monday, October 22, 2012

Barley Project Update: October 18th

Stopped by Jeff Jenning's Farm in Luray, to check on the 2 Row Malting Barley that he has planted in September.  It looks fantastic.  The single plants that initially germinated are now "tillering"- meaning producing off shoots from the parent plant.  Each off-shoot will produce a head of barley, which will ultimately be harvested and used to make malt.

This barley's growth will slow down during the winter and then start up again in the spring, with a projected harvest date of end of May of June.


Friday, September 28, 2012

The Barley Project

First installment of our series:  "From the Field to the Tap"

Where we explore the process of producing the ingredients from scratch that create quality craft beer - from growing malting barley, harvesting, steeping & germinating the grains, to the drying/kilning process that creates the base malt from which the sweet liquor (called the wort) is extracted.  Next is producing speciality malts from grains that give added character and flavor.  Locally grown hops and yeast culturing will be be explored, the other two ingredients pivotal in creating delicious flavor and body, to all styles of ales, lagers, porters, and stouts.

First Step - Growing the Barley:
In partnership with a local farmer in Luray, (thanks Jeff!) approximately 1 acre of 2-row malting barley was planted on September 24th, 2012.  A barley variety recommended by Virginia Tech and the USDA was used that performed well in Virginia Test Plots in 2011.  As you can see, a week later, it has already germinated!   This is winter barley that gets planted in the fall, grows through winter, and is harvested in late spring (May/June).  Stay tuned for further updates. 


Thursday, September 27, 2012

Blue Ridge Brewers Association supports "Love Your Downtown"


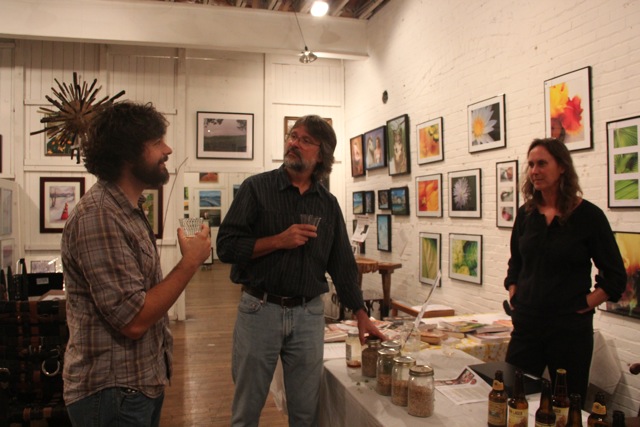
This past evening, September 20th, the Blue Ridge Brewers Association (BRBA) was invited to participate in “Love Your Downtown” a Luray Downtown Initiative (LDI) fundraiser hosted at the Warehouse Art Gallery.  The goals were to introduce our organization to the town, educate attendees to the art of home brewing and the craft beer revolution, offer tastings of home brewed beer and help the LDI with its fund raising effort.  All of the goals were met with the exception of one; offer tastings of home brewed beer. 


Since our last meeting all members with one exception were “tapped out” of their favorite home crafted offerings - members get busy!  Working with LDI a backup plan was concocted to offer several styles across the flavor spectrum to include:

Sierra Nevada - Hellerweise HefeWeisen
Devils Backbone - Vienna Lager
Legend - Pale Ale
Dominion - Hop Mountain Pale Ale
Starr Hill - Pumpkin Porter
Dominion -Oak Barrel Stout
and….
Dan Fause and Mary Balderson’s very own Wicked Cat Ale

The format for each tasting included a brief introduction to the style; describing its flavor profile as a blend of grains, hops and yeast each contributing to the overall character of the beer.  This was followed with an offering to smell and taste the freshly milled grains, bury their nose in this year’s hop harvest from BRBA’s very own Beaver Run Brewery’s hop garden and, depending on the style, catch a brief whiff from jars of honey and whole clove.  These “hands on” sensory guides enabled tasters to really detect nuances present in each style being offered.


Sidebar discussions evolved around the beer making process, grain malting, commercial brewing in Luray, English Bitters (who’s brewing it), growing local, pooling resources, underground irrigation, geology along the Stanley Fault, future BRBA events, yeast survival temperatures, beer/food pairing, and growing and harvesting hops at the local scale versus at the commercial scale. Four tasters signed up and are interested in future Blue Ridge Brewers Association meetings and events.